- Download file, named ex2_top1.v
- Launch Quartus II.
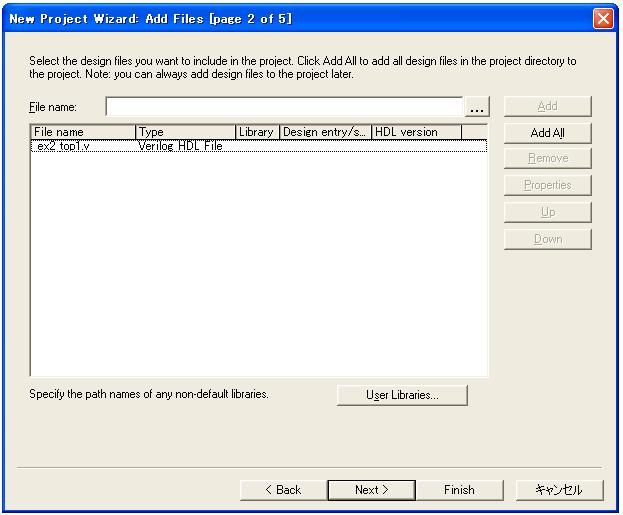
- Select "File"->"New Project Wizard...", and create new
project.
- Set workspace at Y drive, the project name is ex2_top1,
the
top module name is top.

- Add ex2_top1.v
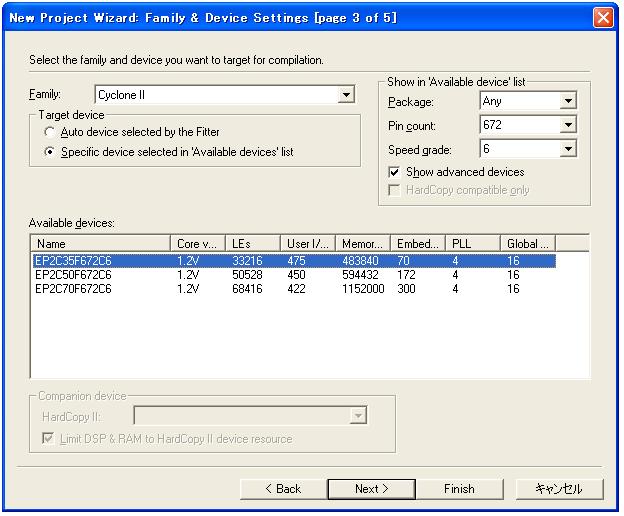
- Select "EP2C35F672C6", Cyclone II family.
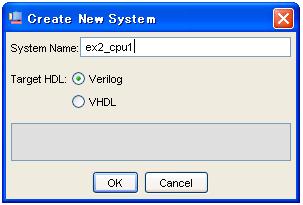
- Select "Tools"->"SOPC Builder...", and launch SOPC Builder.
- System Name is ex2_cpu1
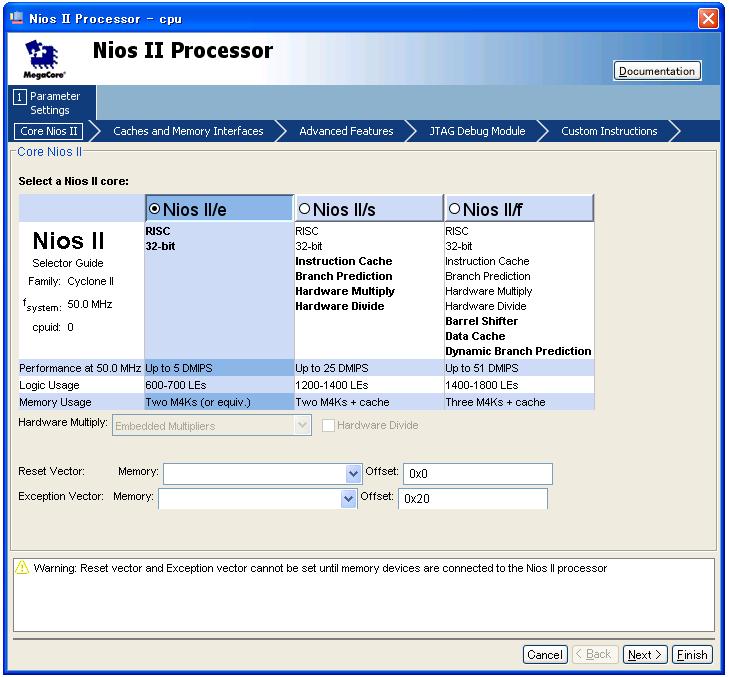
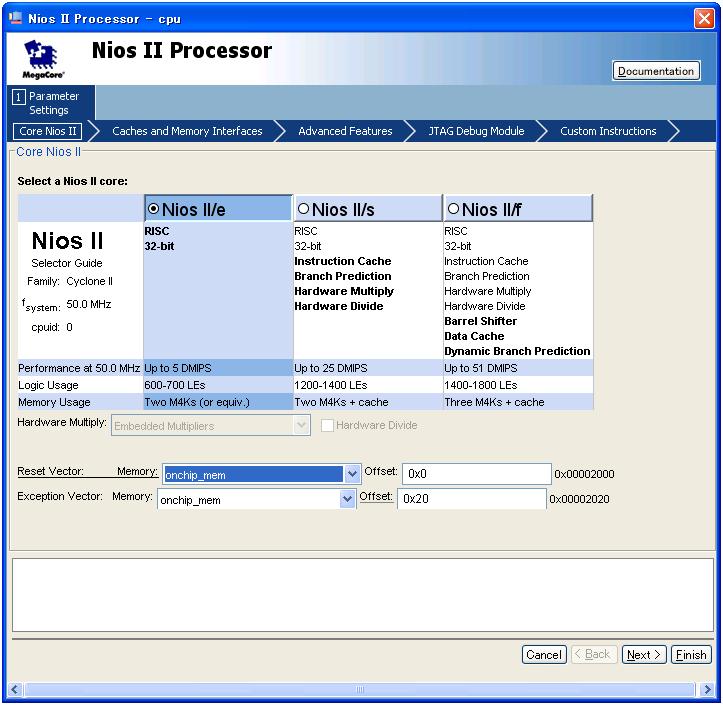
- Select "Nios II Processor".
- Select Nios II/e.
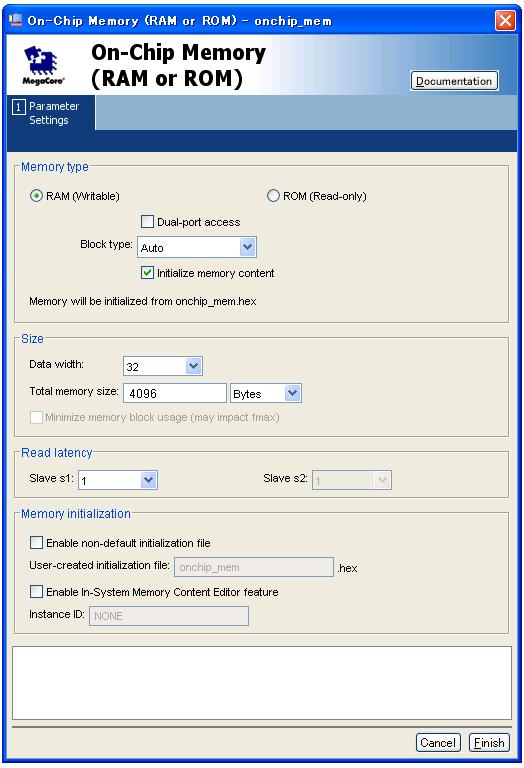
- Select "Memories and Memory
Controllers"->"On-Chip"->"On-Chip Memory (RAM or ROM)".
- Design the 32 width RAM , its total size is 4k byte.
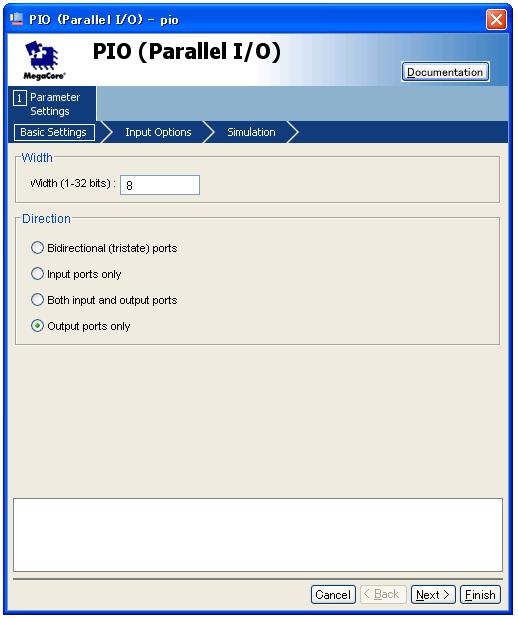
- Select "Peripherals"->"Microcontroller Peripherals"->"PIO
(Parallel I/O)".
- Design PIO, which direction is output port only and the width
is 8bit.
- After designing, name it pio_leds using right click
menu, "Rename".
- Similarly,design PIO with input port with 8bits.
- Name it pio_switches using right click menu,
"Rename".
- Select "Interface Protocols"->"Serial"->"JTAG UART".

- Select added "Nios II Processor", and click "Edit...".
- Set "Reset Vector" to "On-Chip Memory".
- Set "Exception Vector" to "On-Chip Memory".
- Select "System"->"Auto-Assign Base Addresses" from menu bar.
- Select "System"->"Auto-Assign IRQs" from menu bar.
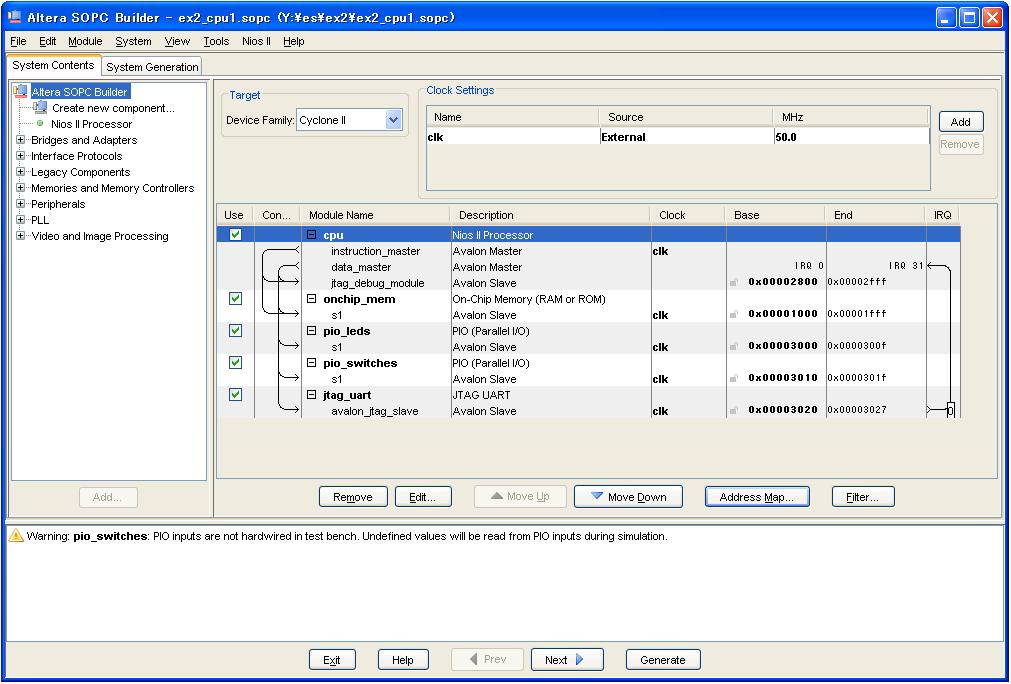
- Click "Generate". "Info: System generation was successful." will
be shown.
- Download file, DE2_pin_assignments.cvs,
and
copy it to your workspace.
- Return to Quartus II, and select "Assignments"->"Import
Assignments..." from menu bar.
- Select DE2_pin_assignments.cvs
- Select "Processing"->"Start Compilation"
- Launch NIOS II 7.2 IDE
- Select "File"->"Project", and crate new project.
- Select "Nios II C/C++ Application"
- Name is set to ex2_software
- Assign Y drive as Specify Location
- Chose PTF file designed by SOPC Builder as SOPC Builder
System PTF File
- Select Blank Project
- Click right click over Project, and select "New"->"Source
File", the file name is program1.c.
- Download program1.c,
and
copy its contents into created new file
- Click Project with right click and select "System Library
Properties".
- Cancel "Support C++"
- Chose "Reduced device drivers"
- Chose "Lightweight device driver API"
- Click project with right click and select "Run As"->"Nios II
Instruction Set Simulator".
- "Welcome to the Embedded Systems Exercise 2!" means the program
works well.
- As a practice, using function of "alt_putstr", add your program
which shows your name and ID.