$ podman pull --platform linux/amd64 hello-world1. Harbor - Docker Registry Alternative
-
https://goharbor.io/ - Official Site
2. Basic information of Harbor
-
Availability: Only within AINS netowrk
-
ID: Use your AINS ID
If you enable your namespace in kubecamp.u-aizu.ac.jp, you will be ready to use the Harbor.
-
Private Project Name: "AINS ID".private
-
Public Project Name: "AINS ID"

Please check your status logging in the Harbor, https://inovtst9.u-aizu.ac.jp/.
3. Getting started
This section describes basic usage.
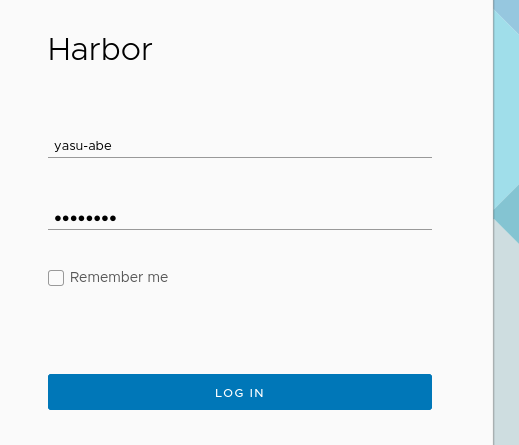
3.1. Log in to Harbor
Go to https://inovtst9.u-aizu.ac.jp/ and log in with your AINS ID and password.
3.2. Creating and preparing docker container images
From here, we will run the docker command.
Please download the hello-world container from docker.io in advance. If you build from your Dockerfile, replace hello-world with the appropriate name.
Confirm that the successed of pull as follows,
$ podman images hello-worldREPOSITORY TAG IMAGE ID CREATED SIZE
hello-world latest fce289e99eb9 12 months ago 1.84kBTransfer (push) the hello-world:latest image downloaded to podman on this local PC to Harbor (inovtst9.u-aizu.ac.jp).
3.3. Transfer to Harbor (inovtst9.u-aizu.ac.jp)
Before proceeding, run the podman login command at first.
$ podman login inovtst9.u-aizu.ac.jpYou will be prompted to enter your Username and Password here, and enter your AINS-ID information.
Username: s12xxxxx
Password:
Login Succeeded
Please check the message, "Login Succeeded".
Your AINS ID information is stored in /run/user/$UID/containers/auth.json on your local file-system of thinkpad.
Remember to run podman logout inovtst9.u-aizu.ac.jp after you are done.

When you use the docker command, the authentication information is stored in ~/.docker/config.json.
Please be sure to execute ``docker logout inovtst9.u-aizu.ac.jp`` command as follows in order to delete information related to ID and password from this file.
3.3.1. Name the hello-world:latest for your own use
Give an alias to the container image on the local PC in the format Server name/Project name/Repository name:TAG. The orignal name is displayed by the podman images command.
-
Server name - It must be "inovtst9.u-aizu.ac.jp".
-
Project name - Specify the Project name you created when you logged into Harbor with a web browser (we will assume below that it is the same as your user ID).
-
Repository name - Specify any name (e.g. "my-hello-world")
-
TAG - (e.g. "latest" or "1.0")
$ podman tag hello-world:latest inovtst9.u-aizu.ac.jp/$(id -un)/my-hello-world:1.0This command does not output anything to the screen when successfully finished.
3.3.2. Transfer named images to Harbor
This alias, Server name/Project name/Repository name:TAG, will be used to register the project with the Project created on Harbor.
$ podman push inovtst9.u-aizu.ac.jp/$(id -un)/my-hello-world:1.0The push refers to repository [inovtst9.u-aizu.ac.jp/$(id -un)/my-hello-world]
af0b15c8625b: Pushed
1.0: digest: sha256:92c7f9c92844bbbb5d0a101b22f7c2a7949e40f8ea90c8b3bc396879d95e899a size: 524Please access Harbor (inovtst9.u-aizu.ac.jp) from your web browser to check if the image is actually registered.
Please be sure to execute podman logout inovtst9.u-aizu.ac.jpo` command as follows in order to delete information related to ID and password from this file.
$ podman logout inovtst9.u-aizu.ac.jp4. Using Harbor from Podman
Since the machine on which you run podman push already has images, this section describes how to use images registered from Seminar Room 10 or other machines on campus.
If you have made your project be public, you do not need to use the podman login command. For example, the public inovtst9.u-aizu.ac.jp/<your Project name>/my-hello-world:1.0 image can be used as follows.
## Before download, be sure to delete your original image from localhost.
$ podman rmi inovtst9.u-aizu.ac.jp/$(id -un)/my-hello-world:1.0

## Then, download the registered image as follows,
$ podman run --rm --name my-hello-world --security-opt label=disable inovtst9.u-aizu.ac.jp/$(id -un)/my-hello-world:1.0
If success, you can see the following message.
Trying to pull inovtst9.u-aizu.ac.jp/yasu-abe/my-hello-world:1.0...
Getting image source signatures
Copying blob 06aa973b0700 done
Copying config a4e07799a3 done
Writing manifest to image destination
Storing signatures
!... Hello Podman World ...!

         .--"--.
       / -     - \
      / (O)   (O) \
   ~~~| -=(,Y,)=- |
    .---. /`  \   |~~
 ~/  o  o \~~~~.----. ~~
  | =(X)= |~  / (O (O) \
   ~~~~~~~  ~| =(Y_)=-  |
  ~~~~    ~~~|   U      |~~

Project:   https://github.com/containers/podman
Website:   https://podman.io
Desktop:   https://podman-desktop.io
Documents: https://docs.podman.io
YouTube:   https://youtube.com/@Podman
X/Twitter: @Podman_io
Mastodon:  @Podman_io@fosstodon.org
When you got the message "Hello from Docker!" instead of "Hello Podman World", try to execute the following command.
$ podman run --rm -it quay.io/podman/helloIf the Project is set to private, you need to execute podman login inovtst9.u-aizu.ac.jp in advance. The following image is registered in the yasu-abe-priv project, which is private. Your podman login will not work because you are not registered in the project members list.
$ podman run --rm --name mynginx inovtst9.u-aizu.ac.jp/yasu-abe.private/my-nginx:1.0Trying to pull inovtst9.u-aizu.ac.jp/yasu-abe.private/my-nginx:1.0...
Error: initializing source docker://inovtst9.u-aizu.ac.jp/yasu-abe.private/my-nginx:1.0: reading manifest 1.0 in inovtst9.u-aizu.ac.jp/yasu-abe.private/my-nginx: unauthorized: unauthorized to access repository: yasu-abe.private/my-nginx, action: pull: unauthorized to access repository: yasu-abe.private/my-nginx, action: pull4.1. Register your "my-nginx" image
The my-hello-world:1.0 was an application that only output messages to the screen, then stopped immediately.
To check the operation with Kubernetes, the application needs to keep running like a web server, so let’s register an appropriate nginx image by following the same procedure below.
$ podman pull --platform linux/amd64 docker.io/library/nginx:latest
$ podman tag nginx:latest inovtst9.u-aizu.ac.jp/$(id -un)/my-nginx:1.0
$ podman login inovtst9.u-aizu.ac.jp
$ podman push inovtst9.u-aizu.ac.jp/$(id -un)/my-nginx:1.0
$ podman logout inovtst9.u-aizu.ac.jp
Now the my-nginx:1.0 is registered in your project in Harbor (https://inovtst9.u-aizu.ac.jp/).
5. Using Harbor from Kubernetes
When executing the following tasks, please be sure to update the id-token in your ~/.kube/config file to execute the kubectl command.
Kubernetes uses a container engine, such as docker. Let’s run the my-nginx:1.0 container on our kubernetes using the following two files.
5.1. Execute deploy-nginx.yaml
$ curl -s"https://web-int.u-aizu.ac.jp/~yasu-abe/ja/sccp/manual/harbor/deploy-nginx.yaml" | sed -e "s/s12xxxxx/$(id -un)/" | kubectl -n $(id -un) apply -f -5.2. Execute svc-nginx.yaml
$ kubectl -n $(id -un) apply -f "https://web-int.u-aizu.ac.jp/~yasu-abe/ja/sccp/manual/harbor/svc-nginx.yaml"Please make sure the current status as the following command.
$ kubectl -n $(id -un) get all -l app=harbor-nginxNAME READY STATUS RESTARTS AGE
pod/harbor-nginx-58bc5c5976-4fcwg 1/1 Running 0 3m25s
pod/harbor-nginx-58bc5c5976-tc2rw 1/1 Running 0 3m24s
NAME TYPE CLUSTER-IP EXTERNAL-IP PORT(S) AGE
service/harbor-nginx ClusterIP 10.233.63.156 <none> 80/TCP 11m
NAME DESIRED CURRENT READY AGE
replicaset.apps/harbor-nginx-58bc5c5976 2 2 2 3m25s
replicaset.apps/harbor-nginx-65d5c68c79 0 0 0 4m56sTo access this application, the svc (service) must be changed to assign an IP address with type as LoadBalancer, or change the destination from Ingress to this service/harbor-nginx.
If you would like to access to this nginx server, please try the following procedures.
apiVersion: v1
kind: Service
metadata:
  name: s12xxxxx-svc
spec:
  type: ClusterIP
  ports:
     -  port: 80
        protocol: TCP
        targetPort: 80
  selector:
    app: harbor-nginx
$ curl -s "https://web-int.u-aizu.ac.jp/~yasu-abe/ja/sccp/manual/harbor/svc-proxy.yaml" | sed -e "s/s12xxxxx/$(id -un)/" | kubectl -n $(id -un) apply -f -service/yasu-abe-svc configured$ kubectl -n $(id -un) exec -it $(kubectl -n $(id -un) get pod -l app=harbor-nginx -o jsonpath={.items[0].metadata.name}) -- bash -c "mkdir -p /usr/share/nginx/html/$(id -un) && echo Hello World, $(id -un) at $(date) > /usr/share/nginx/html/$(id -un)/index.html"$ curl -s https://kubecamp.u-aizu.ac.jp/$(id -un)/Due to the "replica: 2" configuration, you can see the following message or the nginx’s 404 Not Found page.
Hello World, yasu-abe at Mon Mar 18 04:14:28 PM JST 20245.3. (Off-topic: For advanced users) When the Project is set to Private
If you have created a private project in Harbor, you can configure the YAML file as follows.
First, create a secret object with an appropriate name (in this case, "selfreg") in your namespace of kubernetes.
## The following command stores your password in the "regpasswd" variable.
$ read -s regpasswd
$ kubectl -n $(id -un) create secret docker-registry selfreg --docker-username=$(id -un) --docker-email=$(id -un)@u-aizu.ac.jp --docker-password="${regpasswd}"

## Otherwise, you can create the secret/selfreg with auth.json alternatively.
$ kubectl -n $(id -un) create secret generic regcred --from-file=.dockerconfigjson=/var/run/user/$(id -u)/containers/auth.json --type=kubernetes.io/dockerconfigjson
In the YAML file, add imagePullSecrets: under spec: to use the "selfreg" secret which created here.
    spec:
      imagePullSecrets:
      - name: selfreg
Then, execute YAML file by the kubectl apply -f command